User Menu
The user menu allows the current user to obtain information about their account and take certain actions. To open the user menu, click on your username at the top right of the page:
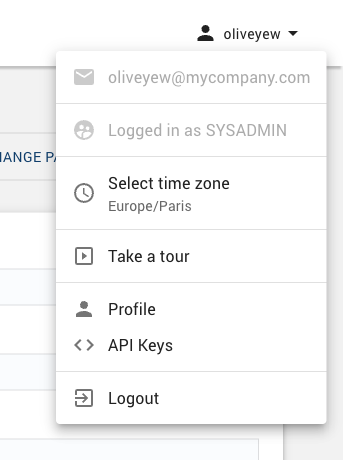
The meanings of the drop-down entries are as follows:
|
Displays the email address of the logged-in user. |
|
Displays the role of the user (if different from STANDARD). |
|
Launches a dialog that gives a tour and overview of the Cluster Manager. |
|
Navigates to the Profile page, where the user can edit their profile information. |
|
Navigates to the User API keys page, where the user can edit their API keys. |
|
Logs the user out and opens the login page. |
Profile
The profile page
The Profile page allows users to edit information associated with their accounts.
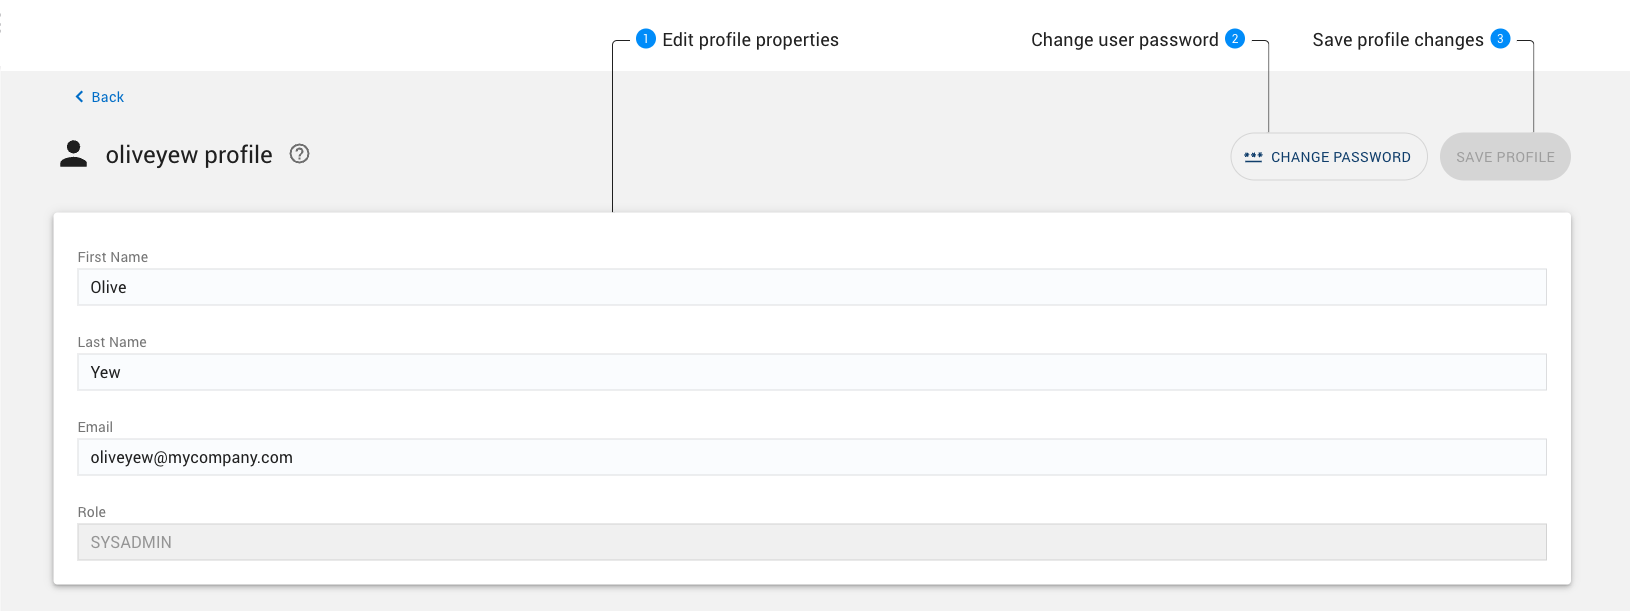
Properties can be edited in this panel.
The CHANGE PASSWORD button opens a dialog that allows the user to change their password for interactive login to the Cluster Manager.
The SAVE PROFILE button saves any changes made to this panel (1).
Editing the User Profile
Users with local accounts can update their profile information on the Profile page as follows:
Edit the new profile information in the form (1).
Save those changes by clicking on the SAVE button (3).
Changing the User Password
Users with local accounts can change their passwords with the following steps:
Click on the CHANGE PASSWORD button (2).
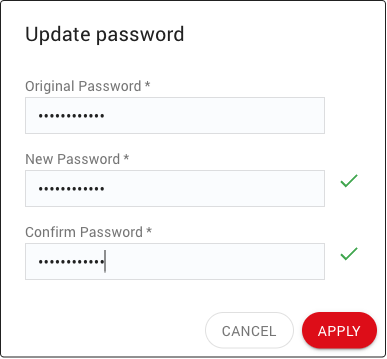
Enter the current and new password in the Update Password dialog:
Note
Passwords must comply with the Password Policy as defined be a SYSADMIN user in the Password Policy settings.
API Keys
An API key (Application Programming Interface key) is composed of an access ID and a secret key. API keys are the recommended approach for connecting applications to a Cluster Manager. When the Cluster Manager authenticates access using an API key, all related actions are performed on behalf of the user who owns that key.
When creating an API key, you can specify an optional application name and description to help keep track of how the key is being used. Once a key is created, you can download an associated client license file, which contains the API access ID, the secret key, and the Cluster Manager URL. This license file can be used by client applications and command-line tools to connect to the Cluster Manager. The Cluster Manager keeps track of the timestamp and IP address of the last API key usage.
An API key can be enabled or disabled by either the owner or the system administrator.
This set of API key features was designed to simplify the task of monitoring API keys, detecting unwanted usage, and safely rotating keys by disabling previous keys before permanently deleting them.
The API Keys page
The API Keys page displays all of the keys associated with your account:
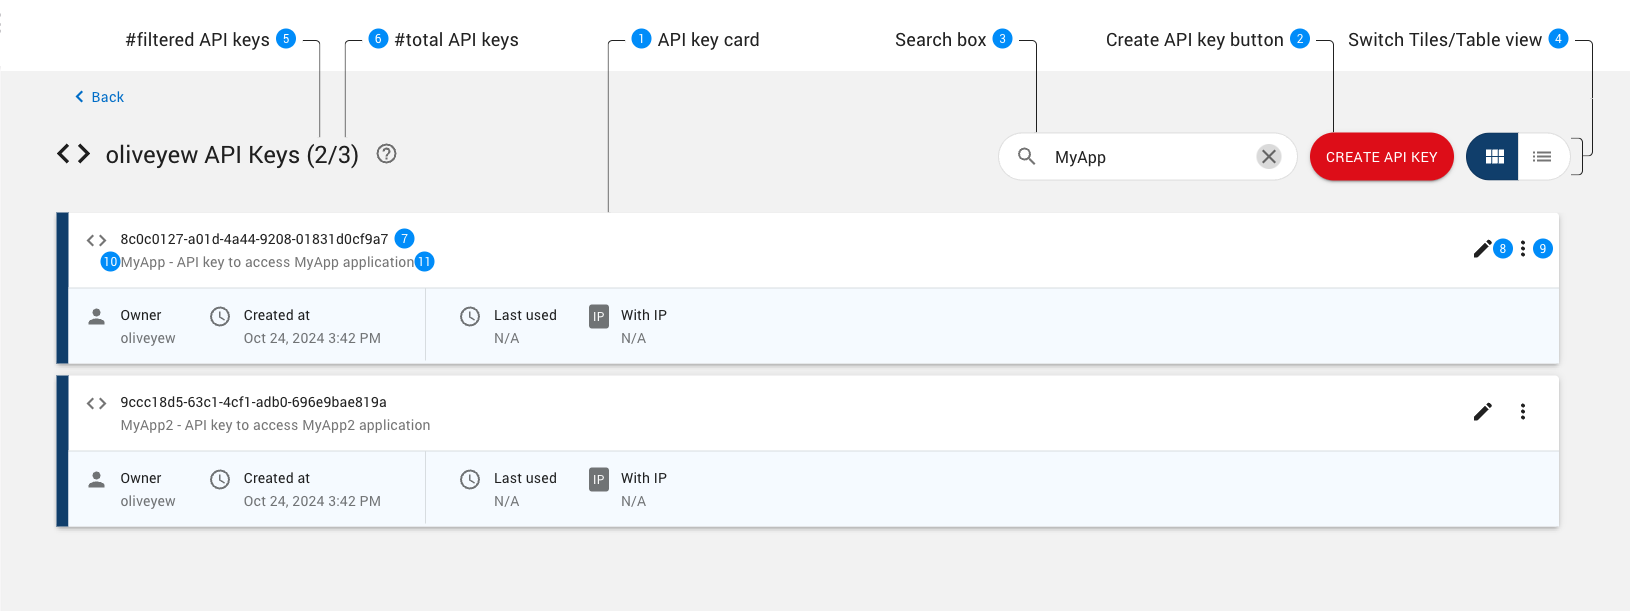
When the page uses the Tiles display mode (4), API keys are displayed as tiles (cards). Each card displays properties associated with the API key and lists several possible actions:
Button opens a dialog to create a new API key.
API keys can be filtered using the Search box.
Button switches the display mode: - Tiles mode displays API keys as tiles (cards) (1) - Table mode displays API keys as rows of a table. Details can be found here.
The number of tiles / rows of the table.
When the page has been filtered, two numbers are displayed to the right to the page title showing respectively the number of API keys matching the current filtering and the total number of API keys. If no API keys have been filtered, only the total number of API keys is displayed.
Searching
API keys can be filtered using the Search box (3). The user can provide an arbitrary search string, and an API key matches if that string is found in any of the properties associated with that key.
Synchronization with page URL
The Cluster Manager creates permalinks for all tables that can be filtered or searched. Changes applied to Search boxes are automatically reflected in the page URL, thus allowing you to copy and paste the URL to easily retrieve the same display later. For example, the URL http://localhost:61080/editprofile?search=MyApp would display only API keys associated with the MyApp application (assuming the Cluster Manager is running on localhost:61080).
Creating an API key
Users can create new API keys with the following steps:
Click on the CREATE API KEY button (2)
Edit the API keys properties in the dialog and click on the CREATE button:
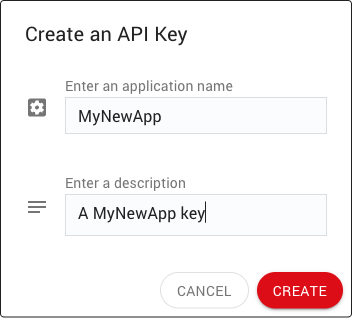
Another dialog will pop up, displaying the access code for the newly created API key:
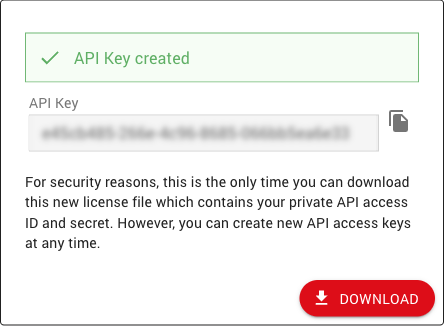
Click on the download button to download a license file associated with this new API key.
Editing an API Key
Users can change the properties of API keys they own with the following steps:
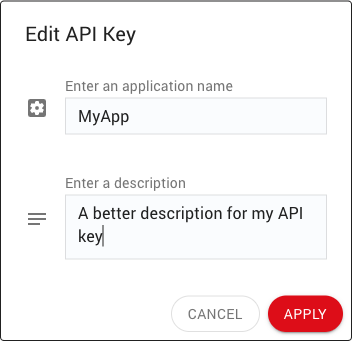
On the card for the API key, click on the EDIT button (8).
Edit the API key properties in the dialog and click on the APPLY button.
Deleting an API key
Users can delete API keys they own with the following steps:
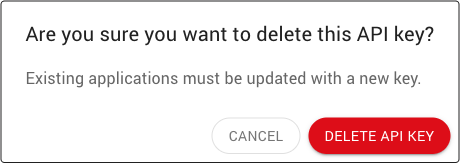
On the card for the API key, click on the menu button (9) and select the Delete API Key menu item.

Confirm that the API key can be deleted.
Disabling an API Key
User can disable API keys they own with the following steps:
Click on the menu button (9) and select the Disable API Key menu item.

Confirm that the API key can be disabled.

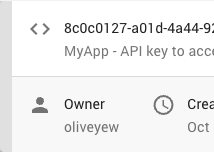
Once completed, the left border for the API key will be grayed out:
Enabling an API Key
Users can enable API keys they own with the following steps:
Click on the menu button (9) and select the Enable API Key menu item.

Once completed, the left border for the API key will turn blue:
