Batches
A batch is a specification for an optimization task. It contains all inputs necessary to perform the task (model data and optimization parameters), as well as a description of the results that are needed upon completion. A batch specification is built off-line and submitted to the Cluster Manager. The Cluster Manager then submits the batch job for execution, at which point the optimization model will be solved and results will be generated. If a batch job fails for reasons outside of its control (e.g., the node it was running on went down), a new job will be created to retry the batch. Once the batch has completed, the results are stored on the Cluster Manager and a client can retrieve them.
The Batches Page
The Batches page in the Cluster Manager looks like this:
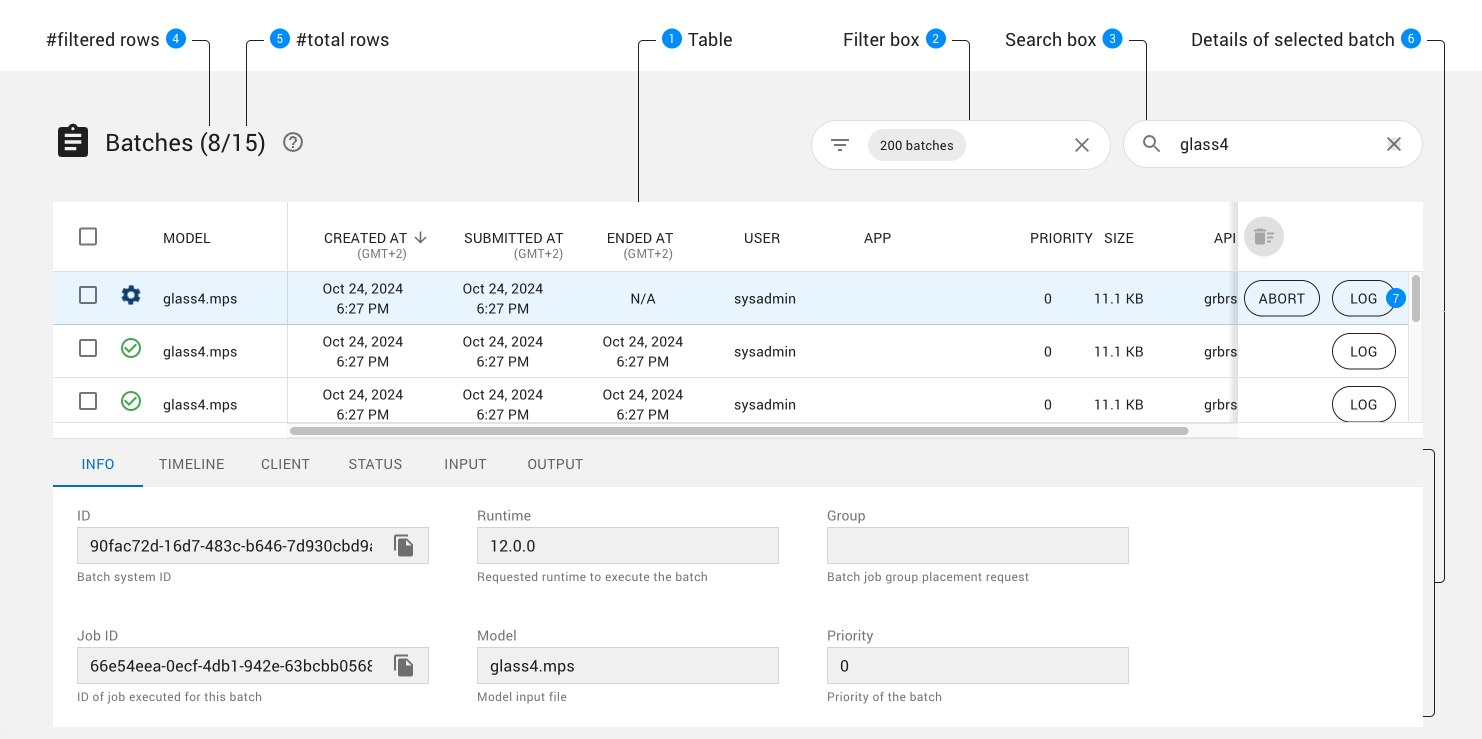
- This page shows a table of all batches that have been created on the Cluster Manager (created, aborted, and completed). Each line in the table provides information about a batch, including the current status, the creation and completion times, the priority, and the API used to create the job. The current batch status is shown using an icon:

Batch has been created.

Batch has been submitted, and an associated job has been submitted.

Batch has been aborted; associated job will be aborted (if it hasn’t been already).

Job associated with the batch has failed.

Job associated with the batch has successfully completed.
Batches can be sorted by various attributes by clicking on the corresponding column headers. Up and down arrow icons allow you to select the sorting direction.
Batches displayed in the table can be filtered using either the Filter box or the Search box. Details can be found in the Filtering and Searching section.
The number of rows of the table.
When the table has been filtered, two numbers are displayed to the right of the page title showing respectively the number of batches matching the current filtering and the total number of batches. If no batches have been filtered, only the total number of batches wil be displayed.
When you select a batch from the table (highlighted in blue), the tabs below the table allow you to obtain additional information about that batch. Choosing a tab brings up the corresponding information.
The LOG button opens a new page displaying a dashboard for the job associated with that batch. The page includes:
A panel containing the optimization log for that job.
The Objective graph showing the progress of the best objective over the time.
Tabs that provide more details about the job.
See the Log section for more details.
Filtering and Searching
Batches displayed in the table can be filtered using the Filter box and the Search box.
Filtering
The Filter box provides the user with a set of predefined filters as shown below:
|
When clicking on the left icon of the filter box, a dialog is displayed to edit the filters to apply. |
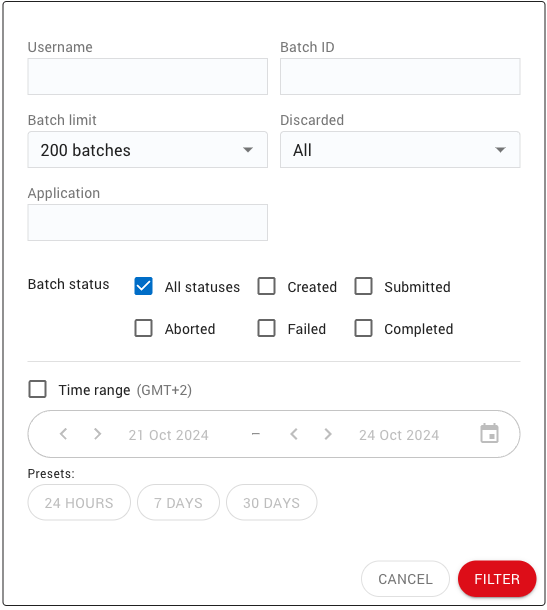
By default, users having one of the roles ADMIN, SYSADMIN, or READONLY will see all batches. Other users will only see batches they have launched. This default filter can be changed from the Filter box.
When the table has been filtered, two numbers are displayed to the right of the page title showing respectively the number of batches matching the current filtering and the total number of batches. If no batches have been filtered, only the total number of batches wil be displayed.
Searching
The Search box enables users to further refine the results by specifying an arbitrary search string. In order for a batch to be displayed, the search string must be present in at least one of the columns in table for that batch, or in the job batch ID.
Note
It is important to note that filtering with the Filter box is usually applied server side, while searching with the Search box is always performed client side. That means that the searching is done on results that were already filtered by the server, so it it is preferable to use the Filter box first and then use the Search box to refine the results. Using the Search box as an alternative to the Filter box could result in missing items.
Synchronization with page URL
The Cluster Manager creates permalinks for all tables that can be filtered or searched. Changes applied using either the Filter or Search boxes are automatically reflected in the page URL, thus allowing you to copy and paste the URL to easily retrieve the same display later. For example, the URL http://localhost:61080/batches/main?status=SUBMITTED would display only batches in a submitted state (assuming the Cluster Manager is running on localhost:61080).
Aborting Batches
Batches can be aborted from the Batches page with the following steps:
Click on the
ABORTbutton for the batch you want to abort.
Confirm that the selected batch should be aborted.
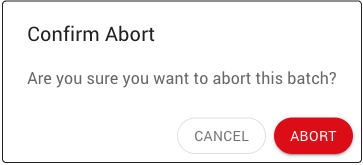
Aborted batches will show a change of status once the abort has been completed and recorded:
Note
STANDARD users can only abort batches they launched.
READONLY users cannot abort any batches.
SYSADMIN and ADMIN users can abort batches of any users.
Submitting Batches
The Submit Batch page allows users to submit batches interactively. It provides an alternative to using the grbcluster batch command to submit a batch from the command line (see grbcluster batch --help for details on command-line batch submission).
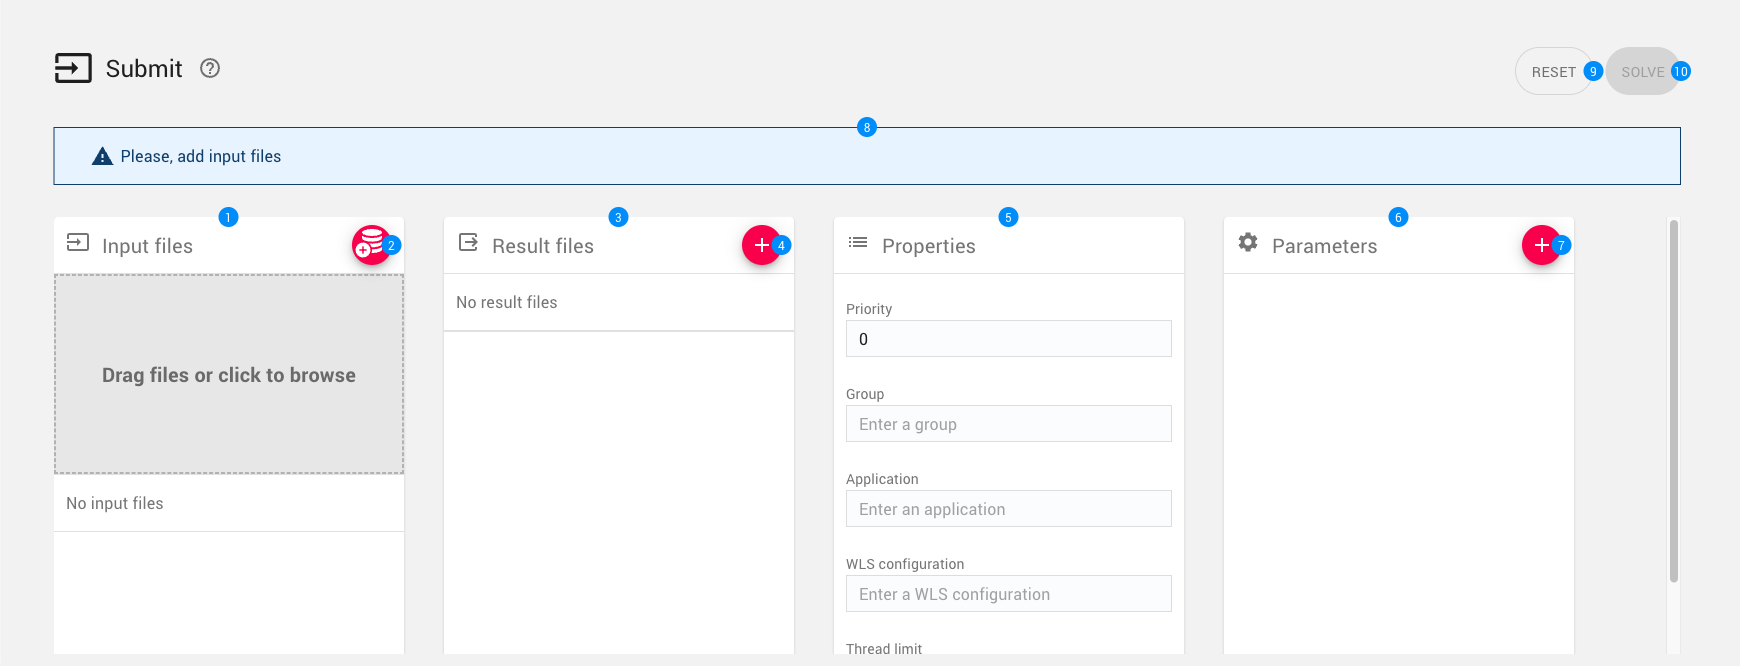
The first pane on this page allows you to select the model files for the batch. Files can either be:
Dragged-and-dropped into the drop area of the pane.
Selected from a file chooser (by clicking on the drop area).
Selected from the file repository (by clicking on the repository button) (2).
See the Repository section for details on adding files to the repository.
The second page allows you to indicate what result files you would like. The top-right button of the pane (4) opens a dialog that allows you to select the format of result file(s).
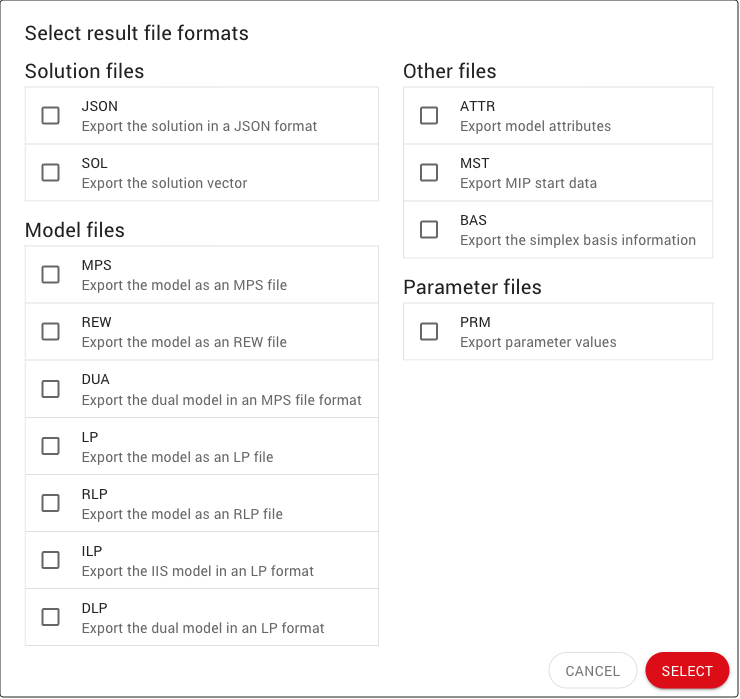
After result file formats have been selected and the dialog has been closed, the selected formats will appear in the Result files pane.
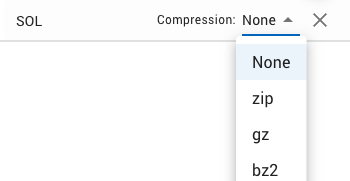
Note that you can request that the result files be compressed using a dropdown menu:
The third pane allows you to configure batch properties. The user can specify the
Priority,GroupandApplicationfor the batch.The fourth pane allows you to set batch parameters.
Click on the top-right button (7) to add a new Gurobi parameter. These parameters are passed to the optimization engine and affect the solution process. Edit the
NameandValuefields for the new the parameter:
The page includes a section that displays messages or warnings that alert the user to problems with the configuration of the batch, and suggests actions to perform to correct those problems..
For example, if no model has been specified, this pane displays a warning to add input files.
Button to reset the batch configuration in this page. Clicking this button resets all edits performed on the Input files, Result files, Properties and Parameters panes.
Button to submit the batch as configured on this page. If the button is disabled, there’s a problem with the batch, and the message pane (8) will provide suggestions for correcting the problem.
Repository
The repository page allows you to upload and manage files that can be reused when submitting a batch.
For example, you may want to upload a single model file but submit multiple batches that solve that same model but using different parameters. You may also want to upload a MIP start (mst) or attribute (attr) file to reuse across multiple models.
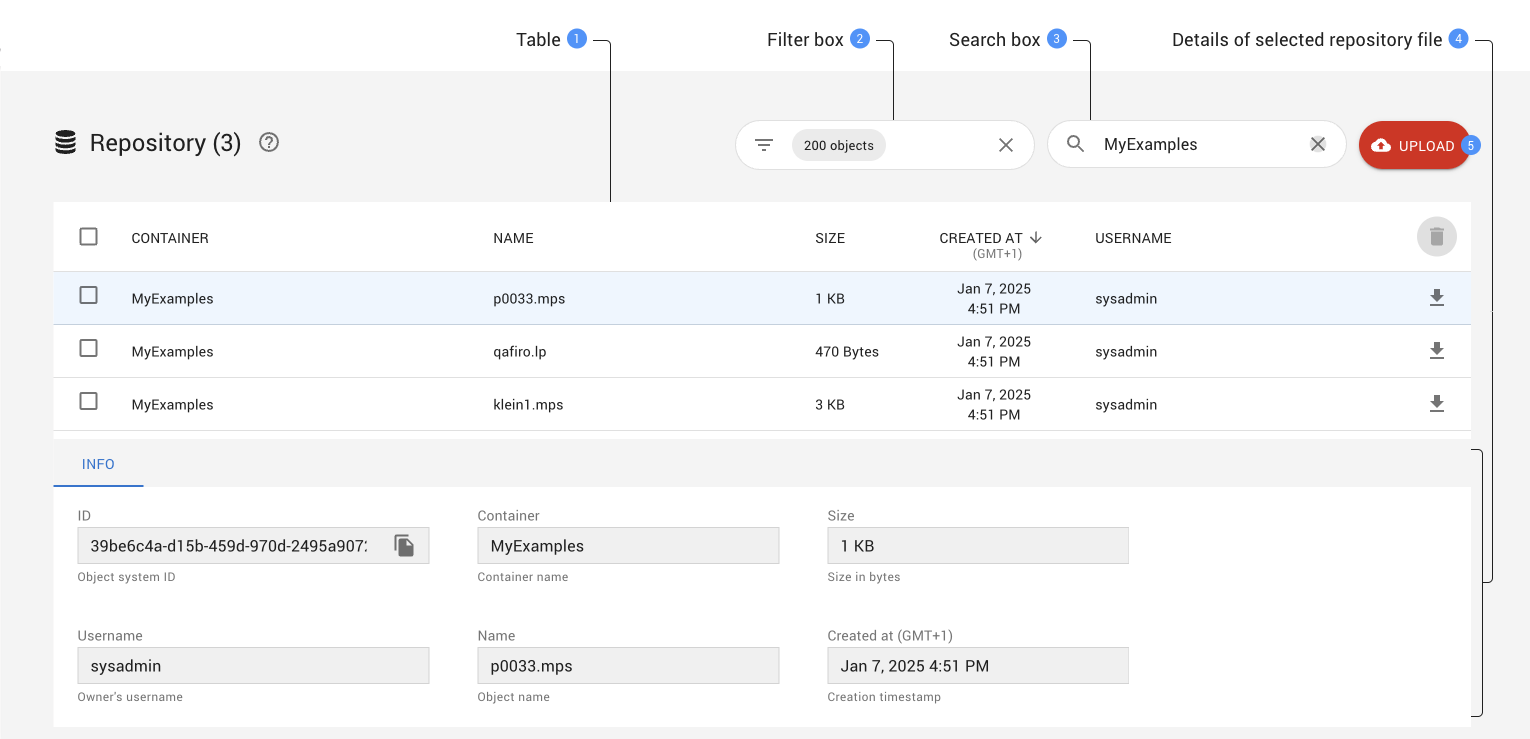
This pages shows a table listing the files that have been uploaded to the repository.
The list can be filtered using the Filter and Search boxes.
When you select a repository file from the table (highlighted in blue), the tabs below the table allow you to obtain additional information about that file. Choosing a tab brings up the corresponding information.
You can upload new file(s) to the repository.
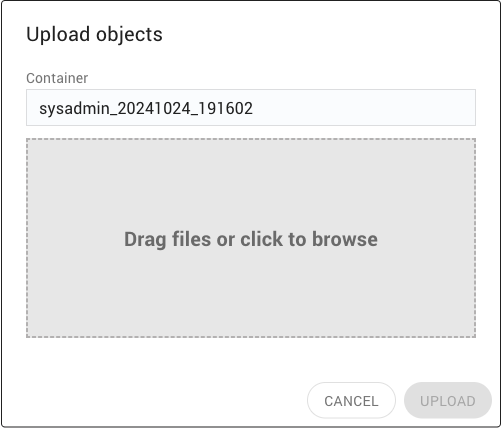
Clicking on the UPLOAD button pops up a dialog box where users can drag-and-drop or select files to upload.
